March 22, 2009
This page starts the documentation of building the stub wings. I knew that I wanted to put fuel in the stub wings and after to much thinking on the subject, I decided that I would build "wing-skins" for the stub wings. What I will post here is the method I've used to create these wing-skins. When I first started this effort, I went about it by trying to make a male mold from which I would then build a female mold (I don't know why). I started off the whole project buy using scrap material and "cheap" materials I could buy locally rather than use my "expensive" aircraft grade material. I learned a few things in the process. First, there is no substitute for using the right stuff for the task at hand. The spray foam that comes in a can, while it can be used effectively, is not as good as the two part foam you get from Wicks or Aircraft Spruce. Second, Bondo brand fiberglass resin melts the plastic I use to create lay-ups on. Third, that same Bondo resin sets off MUCH faster than West epoxy! The list goes on and on, but you get the drift.
I did manage to get a good male mold from which to make the female mold. The
process of making the female mold is where I learned many of these "nuggets" of
wisdom. When it came time to finish it so I could pull a wingskin, I decided to
start over and do it right this time. This time, I decided to begin with
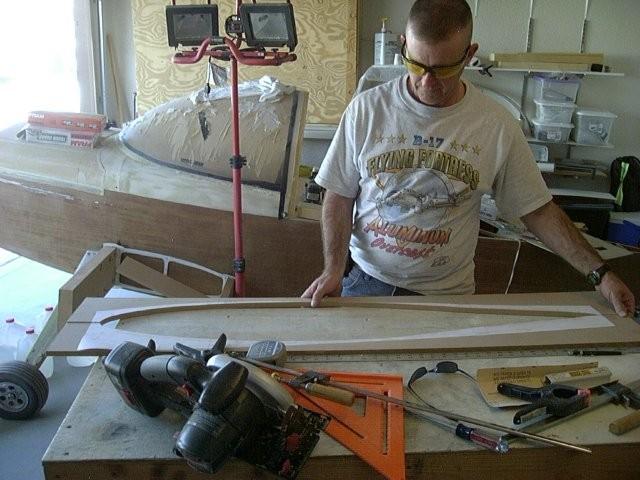
building the female mold from the start. I plotted the airfoils out and
used spray adhesive to attach them to a piece of MDF and then cut them out.
This first picture is of both the top and bottom half of one form. The cut
is made along the chord line. This picture was taken on the 31st of May, 2008.
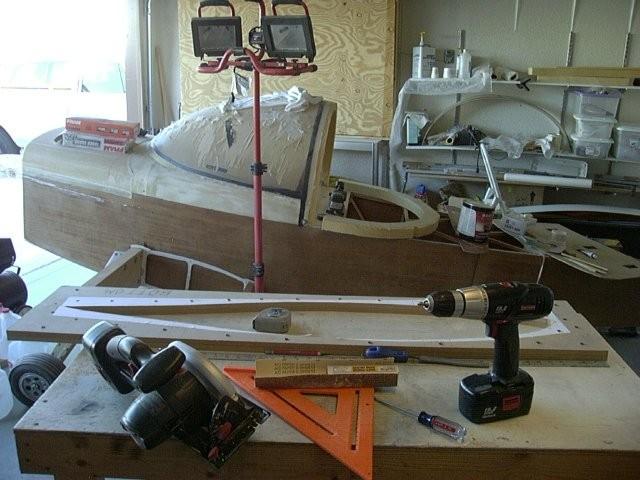
The second image here shows how I attached the first set of airfoils to
the another set with screws so that I could use the router table to make
them identical to the first set.
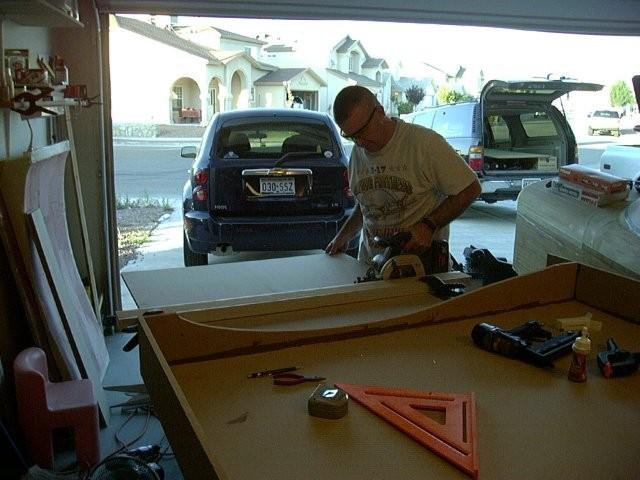
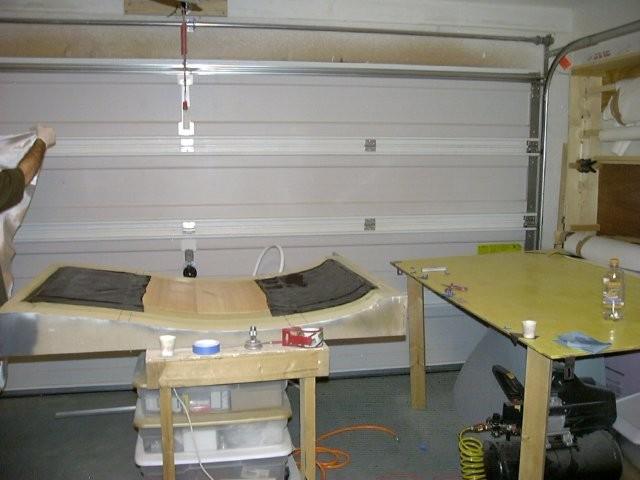
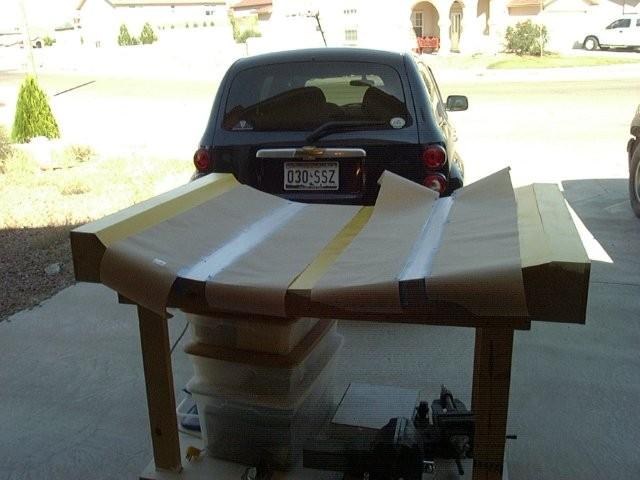
Once both sets were identical, I used them to build a box. This box would
be the foundation of my molds. This next image shows the basic box together.
I'm working on some of the internal bracing that is used not only for stability,
but as a method to keep down the quantity of foam needed to fill it. I decided
to start with the bottom wing skin. I figured I'd learn from it before
building the mold for the top skin.
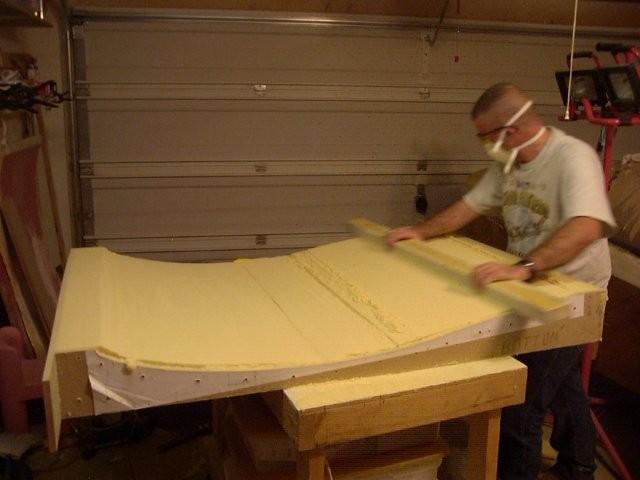
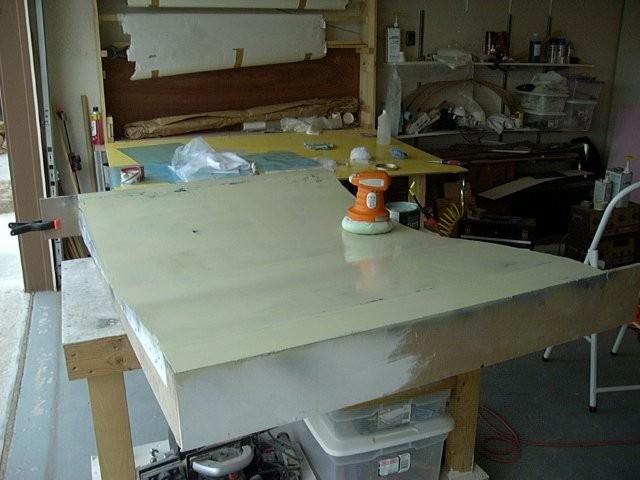
Once the box was filled with foam, the process of sanding begins to shape the
foam to the desired shape of the airfoil.
After the sanding is done (for this stage anyway), I put on a layer of
fiberglass on it. Here I am spreading the micro on the foam before
laying the glass on it.

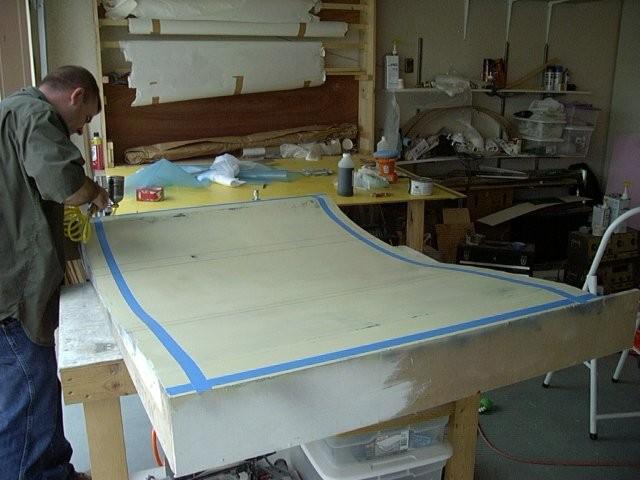
After the layer of glass, it gets painted, then sanded, then painted, then
sanding, then...you get the picture. Once you have a smooth level surface,
I waxed it with mold release wax (at least five layers) and buffed it till
it was really smooth.
After waxing, I taped off an area of the mold and sprayed some release
agent on.
I then pulled off the masking tape and started prepping to build
my first wing skin.
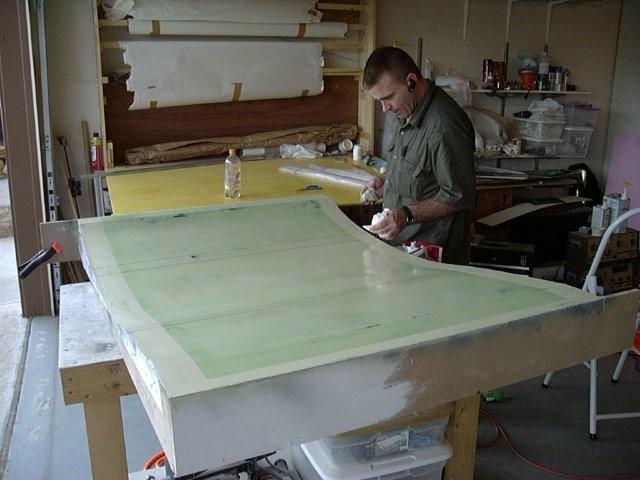
Here I am in the process of working on the skin. My wing skins
on the stub wings are basically two layers of glass with a piece
of 3/32" balsa wood as a core. On the bottom skin, there is also a
piece of carbon fiber on each side of the balsa wood forward of the
main spar and aft of the rear spar. Most of the area aft of the rear spar
will eventually be made into the flap. There is no balsa wood over either
of the spars. In this photo, I'm wetting out a piece of glass tape that
is where the spars are (to build up that area of the skin where there is
no core material).
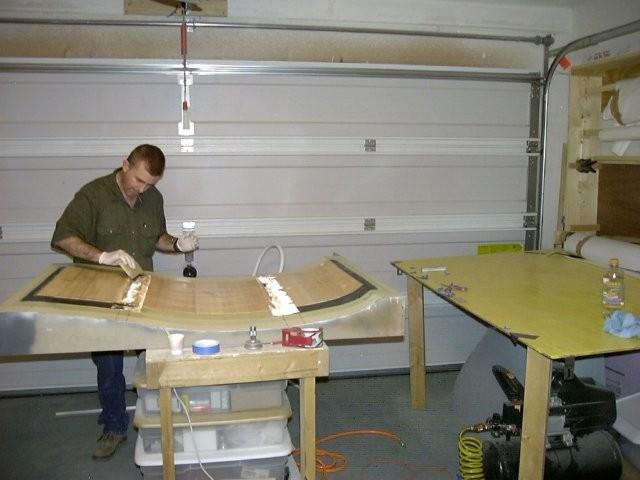
Here I've put both pieces of carbon fiber over the balsa wood. It also overlaps
the area over the spars. I'm in the process of getting ready to put the top piece
of glass over the whole thing. When I do the top wing skin, there will be carbon
fiber over the center section as well.
After the last layer of glass, I put down a piece of peel ply, followed by
a piece of release plastic, then this breather material. Then the whole thing was
put under a vacuum bag and then the pump was turned on to vacuum bag the whole
assembly. The process was then repeated once more to make the second wing
skin.

Once I finished both bottom wing skins, I repeated the mold making process
for the top wing skin. One of the things I did different with this one was
to paint the mold where the spars would go. With the bottom skins, I drew
marks on the mold before applying the release agent, but the marker was difficult
to see sometimes. By painting it, it makes it much easier to see.
I do not at this time have a completed top wing skin to show. Luckily, one of the lessons I learned from the bottom skins was that it took long enough to put everything together and get it wet out, that I decided to make the top skins in more stages. I started with the outer "skin" before the core material. This is when my vacuum pump decided to die. Now that chunk of carbon fiber has a few "wrinkles" in it. I think they will come out and I'll be able to salvage it, but I'm glad it was not the whole assembly. I'll post more once I've finished both top skins.
Back to main page